Friday, 14 June 2019

Baby Niffler - Pistachio


With one baby niffler running about, it was only a matter of time before another one appeared. This little niffler got himself caught rummaging through my shiny jewellery. I couldn't stay mad at him long though, just look at his cute little face. With his light grey coat and distinctive white markings, along with his bright green eyes, this baby niffler is Pistachio. However initially he was introduced as Einstein.


This baby niffler was made from the same pattern as my first baby niffler Persimmon. A pattern that, although based on a basic pattern shape I found online, was heavily edited to create a niffler, and here again edited to create Pistachio' s white fur trim. Although described as grey, or light grey as compared to Persimmon, I ended up using a light blueish denim as I use only recycled materials and that was what I had available.


As with Persimmon, Pistachio has his own bottomless pouch, although maybe not so much bottomless. Once I had all the pieces drawn up, I hand stitched this niffler together. The little hands and feet were a bit tricky to sew and turn out because they were so small, and the hands also had the addition of tiny magnets to allow him to hold onto items that were magnetic.


This baby niffler was given green safety eyes to finish his look. The hands, feet, snout, head and tail were filled with stuffing to define these parts in particular, I then filled the rest of the baby nifflers body with plastic pellets to give him a little more weight and flexibility.


The finished measurements for this cute baby niffler Pistachio are the same as his brother Persimmon's, about 16 cm from snout to tail and about 8 cm from hand to hand when lying flat. I was so pleased that this little niffler turned out just as adorable as my first, and that the featured white fur trim on this niffler turned out as well as it did.

Friday, 7 June 2019

Wonder Woman Key Chain + Necklace + Hairband


Previously I made gift sets from iron beads for the characters of Supergirl and Poison Ivy from the cartoon series DC Superhero Girls. So I decided it was about time I made the most iconic of female superhero's from that series, Wonder Woman. Wonder Woman was also the most request character for me to make, you might have noticed that she is featured as one of the characters for all four of my large topsy turvy dolls.


This little Wonder Woman key chain is from a design I made-up myself using a square peg board and iron beads, also known as perler, hama and pyssla beads. She is small, about 6.5 cm tall, which is a cute size for a keyring. Once she was designed and ironed together I added a jump ring and a cord that I made myself from a waxed yellow cord, cord ends, smaller jump rings and a lobster clasp.


This statement necklace was quite simple to design to and put together after creating a necklace for Supergirl and Poison Ivy. The centrepiece for this Wonder Woman necklace is exactly the same as the Wonder Woman Hair Clip I made previously, then I just added the two collar pieces. After the pieces were ironed I connected them with jump rings and then made the chain from a silk red cord, cord ends, smaller jump rings, a lobster clasp and added a few chain links to make the necklace size adjustable if needed.


This last piece is Wonder Woman's shield, that I also designed. I used a circle peg board to design this, after ironing this was hot glued to a plain black head band that I bought from ebay. Overall I was very pleased with how this Supergirl gift set turned out, I especially liked the necklace which is definitely a statement piece.

Friday, 31 May 2019

Peppermint Toads (inspired by the Harry Potter Series)


I few weeks back I made some chocolate frogs in boxes, only without the chocolate. I was so pleased with how they turned out that I decided to go ahead and make a set of peppermint toads in boxes. I used the same process to make these peppermint toads in boxes as I did with my previous chocolate frogs in boxes, only using alternate patterns for each the toads and boxes.


After a bit of a search online I was able to find a blank template I liked for this box. It was similar enough to the chocolate frog boxes so that both the frog and toad boxes would look as though they belonged together, without being exactly the same. I again used cardboard from cereal boxes as I was happy with how this turned out the first time, and once cut and glued together I decorated them.


I had a much easier time deciding how to decorate these peppermint toad boxes after having already made my chocolate frog boxes. Since the chocolate frog boxes were decorated with a more simple design, I did the same here. The inside of these boxes were left untouched with the designs painted to only the outside of the boxes covering the original outside cereal box.


A quick search online gave me my colour palette. So after a couple of coats of white paint I painted the lid and base of each box in a light blue colour that I mixed up. I then used a silver colour to cover all the sides of the lid and base and finished each box with a silver toad silhouette that I made a stencil of, from the toad pattern. After which I gave a couple coats of mod podge for protection and shine.


I didn't want these fabric toads to look exactly like the frogs I had made, so I instead made these from another free pattern I found online. Once I adjusted the pattern size to fit the boxes, I used a white fabric to represent white chocolate and filled with plastic pellets. These beanie toads have a nice weight to them making them just as fun and toss-able as the frogs I made previously.

Friday, 24 May 2019

Sweet Mochi Creatures


Mochi is a Japanese rice cake and these sweet papertoy creatures were created to resemble those traditional little snacks. With their round bodies and cute little feet, the these creatures are distinguishable by their very different ears, unique faces and of cause their individual colours.


This first trio consists of a beady eyed blue mouse, a pointy eared yellow cat and a purple dog with an eye patch. There are no instructions with the set of templates I got but it wasn't hard at all to figure out where to cut, what pieces to glue and how to assemble these little creatures.


This second trio includes a happy green frog, a long eared pink rabbit and a shy brown bear. The set actually only consists of the mouse, cat, dog, rabbit and bear. However as there is also a blank template included I used it create my frog, colouring him in and drawing on his face and feet myself.


I initially found these Sweet Mochi Creatures years ago when the templates were free, so unfortunately if you were wanting to make a set of these creatures yourself you will have to purchase them. The link to purchase these creatures can be found HERE on the Toxic Paper Factory webpage.

Friday, 17 May 2019

Honeydukes Chocolate Frog Box Key Chain + Frog & Bertie Bott's Beans Box


After creating boxes from iron beads to resemble Harry Potters's school trunk and Newt Scamander's suitcase I wanted to make a chocolate frog box and a Bertie Bott's beans box. I began by searching online to see if patterns for these already existed and found nothing. So after a bit work I was able to create patterns for these myself.


I began with the frog, the one piece I did find an online pattern for. I was initially tempted to make this frog all brown to look more chocolaty, however I decided that it needed the black beads to help give more definition to the finished piece. The all brown frog looked a little too much like he had begun to melt.


The chocolate frog box was very difficult to design. I began by trying to create something more 3D in shape, similar to the boxes seen in the movie, but had to eventually give up on the idea as I just couldn't figure out how to make it work. This was when I decided to make the 3D paper/cardboard model for these boxes complete with fabric beanie frogs.


I eventually decided on a 2D chocolate frog box design, however the first frog I made was too large so a new smaller frog was created to fit inside. This box was made in three layers, the bottom layer and the middle layer were hot glued together, and these were then connected to the lid by fishing line. Lastly magnets were glued on to hold it closed.


Designing the Bertie Bott's beans box was easier then I thought it would be, especially when i simplified the design on the box, replacing the little characters on the top with blue diamond like shapes. I also created the feet on this box, as seen on the Bertie Bott's beans boxes in the movie, as well as a base and top flaps that open.


The sides and base of this Bertie Bott's beans box simply connect together, each ironed piece designed to interlock with each other. The top triangle pieces, the only pieces not to be made on a square peg board, are connected to the box by fishing line and the top of each triangle is threaded with a red cord that allows this to open and close.


Each window of the Bertie Bott's beans box has a clear plastic piece glued to the inside to complete the look. The chocolate frog box has a key chain attached. Overall I am very happy with how these pieces turned out. I have a pattern for these available HERE free.

Friday, 10 May 2019

Cuddle Pillow Toy - Puppy #3


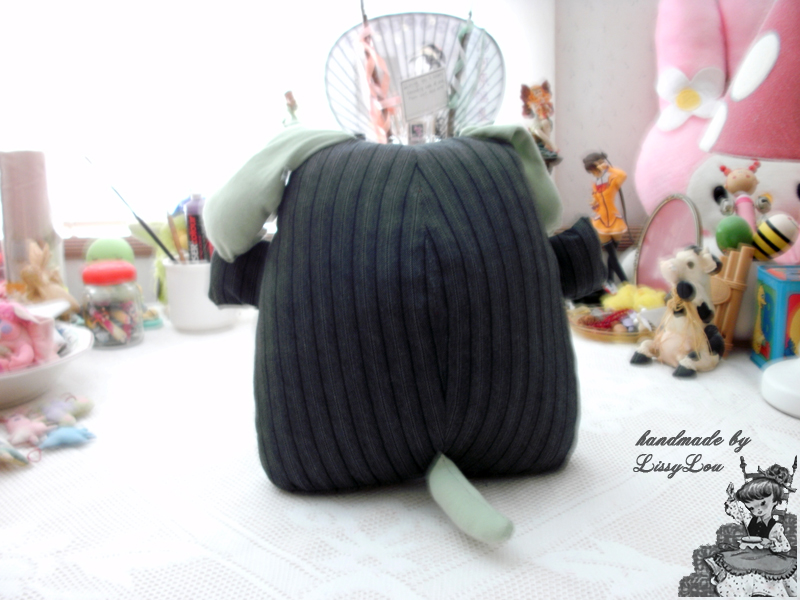
As with all my makes I like to use recycled materials and this amusing puppy was no exception. What once started out as a pair of pinstripe pants has now found new life as a cuddly pillow toy. Along with the additions of a cheeky pink tongue, black safety eyes and blanket stitched nose, as well as a green blanket stitched eyepatch, floppy ears and cute little tail.


The finished size of this puppy pillow toy is a nice roundish 10 inches by 10 inches, making him as comfortable to cuddle as he is to lay on, for little heads at least. I discovered the pattern for this puppy HERE on the Shiny Happy World website in the shop, the pattern includes detailed instruction with pictures on how to make this puppy along with the pattern pieces needed.

Friday, 3 May 2019

Chocolate Frogs (inspired by the Harry Potter Series)


I wanted to make a set of chocolate frogs in boxes, only without the chocolate so I could keep them without the worry of melted frogs, and found a number of box patterns online that look like the ones seen in the Harry Potter movies. However I was unable to use any of these box patterns as I have run out of colour ink in my printer. So I instead decided to fully make some boxes of my own, with non-chocoalte chocolate frogs inside.


To make these boxes I used a blank chocolate frog box template, again found online, and the cardboard from cereal boxes. This cardboard was strong enough without being bulky while also being thin enough without being flimsy. After a lot of cutting and gluing I had the the basic box shape I wanted. All I had to then was figure out how I wanted to decorate them.


Initially I had thought to decorate these boxes in a style more close to those patterns I had found online, however I ended up giving these a more simple look. I left the inside of the boxes plain and painted over the outside of the boxes that was the outside of the cereal box. After a coat or two of white paint, I painted the top and bottom of each box in a dark navy blue and covered the sides in a gold paint.


The top each box was decorated with a gold frog that I painted on from a stencil I created using the fabric pattern for the chocolate frog. This way the fabric frog inside would match the frog design on the lid. Each box was then given a couple coats of mod podge for protection and shine. The fabric pattern I used for the chocolate frog was a free frog sewing pattern that I found online.


The first frog I made was a little to big, but after some resizing I had the perfect sized frogs to sit in the boxes I made. Each frog is filled with plastic pellets to make these tiny beanie frogs, giving them a nice weight to them when jumping or being tossed. I'm really very pleased with how these turned out and despite their simple appearance they are, to me, quite obviously chocolate frogs.